Wednesday, March 26, 2014

Oatmeal Banana Cinnamon Smoothie

In my journey of trying to eat clean, I have been drinking a smoothie that has helped me in fighting off my morning hunger. This smoothie keeps me nice and full until lunch time. It's easy and simply delicious! Hope you enjoy as much as I do.
smoothie, clean eating, healthy

Ingredients:

1/4 cup of oatmeal
1/2 of a banana (frozen)
3/4 cup of Almond Vanilla Milk
Pinch of Cinnamon

Combine all ingredients and blend. Then, Enjoy!
read more "Oatmeal Banana Cinnamon Smoothie"

Monday, March 10, 2014

Everything Needs an Inspiration


The first thing in my dining room was my dining table, chairs, and the painting you see as my inspiration photo. My mom gave this to me as a gift when I first moved into my new home. I just started pulling colors from this photo and worked around it. 

My light fixture used to be a generic light fixture that would be found in most newly built homes. I wanted something that stood out, but like with everything else I needed it not to cost a whole lot. One day walking around the store Hobby Lobby, I came a crossed two planter baskets on clearance. I think I paid less than $10 for both. I came home with the idea of putting them together to make the sphere lighting fixture I have been wanting. I just used the existing hardware that I had and removed anything that I didn't need. Then, spray painted the fixtures because they were a brushed nickel. I also put LED lighting, they don't get hot, save on energy and are supposed to last longer than regular light-bulbs.

Dollar Store plates I hung up using disc plate hangers, bought at Hobby Lobby. Rugs were purchased at Lowe's, on sale for less $30 a piece. I used 2 rugs and just set them side by side to make it appear as one.
read more "Everything Needs an Inspiration"

Egg Hunt...Coming Soon.


Easter is just around the corner, so we created this FREE printable for you to print, frame, and use as Easter decor. Enjoy!
read more "Egg Hunt...Coming Soon. "

Friday, March 7, 2014

Flocked Christmas tree

Although, it isn't the season for Christmas trees, I still wanted to share my DIY Flocked Christmas tree from 2013. 
You can easily buy flocked Christmas trees from a Christmas tree store, but  DIYs can be fun. Here’s how to easily create the beauty of a winter wonderland right on your old shabby tree.

Materials needed: 

 
-Wall Texture Spray
-Cornstarch 
-Glitter


I first set up tree in garage because I was sure it would make one heck of a mess. 


Flock the tree as heavy or as light as you like, but for a more realistic presentation, look for pictures of snow-covered real trees and make them your inspiration. Start flocking your tree from the very top and work your way down. With this technique, there will be less work for you to do as some flocking will fall on the lower branches of your tree. If you like a natural flocked look, spray only the outer tops of branches using light even, strokes. Coat your tree lightly with the wall texture spray and add more when necessary. Now sprinkle cornstarch and glitter sparingly to achieve desired texture.


read more "Flocked Christmas tree"

Wednesday, March 5, 2014

DIY Style-Chalk Finish Paint

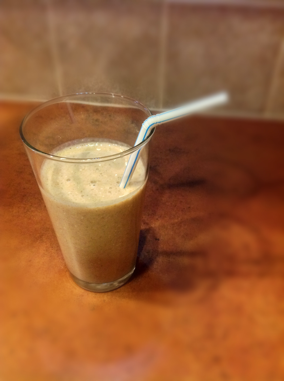
I have these two old stools that my boys use as their dinner chairs, to get something from the counter, to watch Mom make dinner or to help make an espresso drink. ;) These stools were calling for a DIY project. I have been wanting to try this Chalk Finish Paint, the stools were perfect!

I've seen Annie Sloan Chalk paint but it is pricey....so when I saw a way to get a similar look while reading Lowe's Creative Ideas, I was super excited! I really enjoyed this project, it was easy and loved the finished product.

BEFORE


Materials Used:

-Valspar Paint
-Plaster of Paris
-Spray Polyethylene


Tools Needed:

-Paint Brush
-Plastic Bucket


Step 1: 


I mixed 1/3 cup Plaster of Paris with 1/3 cup of water until it is dissolved. Then mix in 1 cup of paint. This was enough to paint both stools.

Step 2:

Clean the surface you will be painting and make sure that it is dry. After your surface is dry then you are ready to paint. (NOTE: you do not have to sand the surface). I did two coats on the non painted stool. The brown stool did require more coats, to ensure the brown paint was completely covered.


Step 3:

I waited 24 hours before spaying the stool with a spray polyurthane. I did two coats. I let dry another 24 hours. I just wanted to be safe!

AFTER


read more "DIY Style-Chalk Finish Paint"